Genesys Uploader Tool
The Genesys Uploader Tool is a standalone Java application for managing accession-level data on Genesys. It lets you map Excel XLSX files, CSV files, or database SQL queries to the Multi-Crop Passport Descriptor (MCPD) format and push the mapped data to Genesys for publication.
Genesys Sandbox is a testing instance available at sandbox.genesys-pgr.org where you can validate and test your configuration before pushing data to the live server.
Looking for the other upload options? See Uploading data.
Installing the Uploader
The Uploader is an open-source project licensed under the Apache License v2.
- Download the package from the downloads section.
- Extract, if necessary, and run the executable for your platform.
| Resource | Link |
|---|---|
| Project page | https://gitlab.croptrust.org/genesys-pgr/anno |
| Pre-compiled binaries | https://www.genesys-pgr.org/content/uploader |
| Git repository | https://gitlab.croptrust.org/genesys-pgr/anno.git |
| Issue tracker | https://gitlab.croptrust.org/genesys-pgr/anno/issues |
Troubleshooting installation on macOS
On macOS Sonoma and later you may need to clear the quarantine attribute by running this command in the Terminal:
sudo xattr -d -r com.apple.quarantine /Applications/Genesys\ Uploader.app
Workspaces and projects
Upon starting the application, you will be presented with a Workspace Launcher that allows you to create a new workspace or load an existing workspace from disk.
A workspace is a folder on your computer that stores your Uploader configuration files and any JDBC drivers needed to access your data sources.
Creating a new workspace
When you first start the application, create a new workspace to store your configuration files.
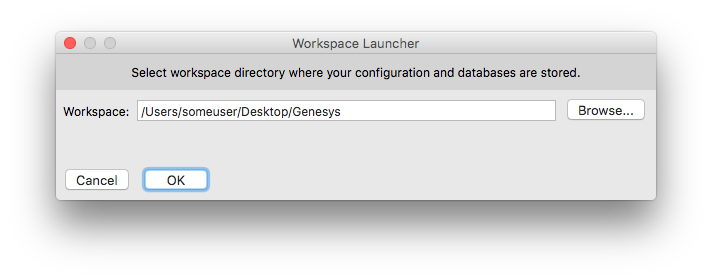
Click Browse and navigate to the directory where you wish to create the workspace. You may need to create a new folder. Press OK to confirm.
The application will check that the selected folder is empty before proceeding.
Loading an existing workspace
Click Browse and navigate to the directory containing your existing workspace data. Press OK to confirm.
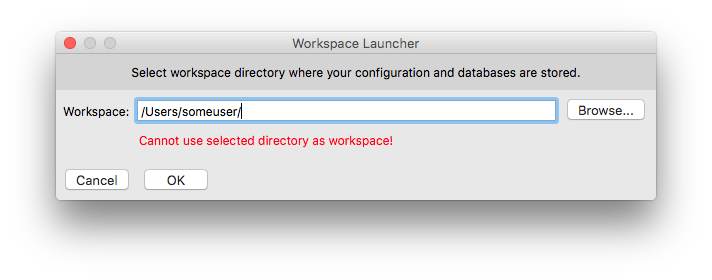
The application will check that the selected folder is a valid Uploader workspace folder.
Projects
Uploader lets you manage settings, data sources, and data mapping in project files. A project file contains:
- Server settings, including the Genesys server URL, application keys and secrets
- Data sources: CSV, Excel and database queries
- Column configuration and mapping to MCPD
It is good practice to maintain one project file with the configuration used to test the data and push it to the Genesys Sandbox environment, and a separate project file to publish data to the production servers.
Window layout
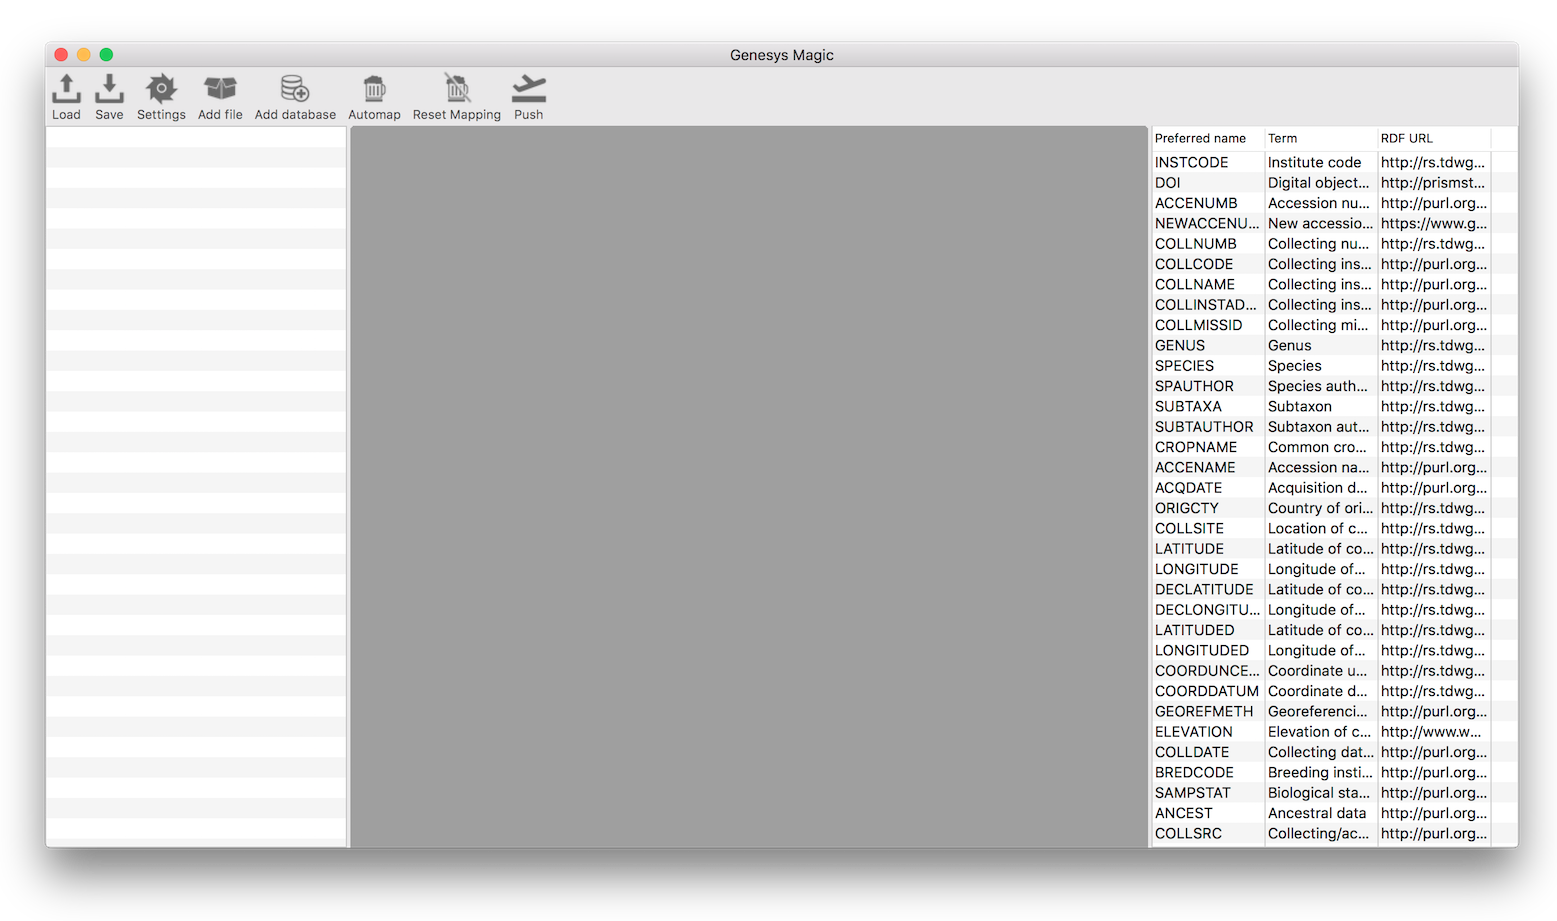
After workspace selection, the main application window is loaded with four sections:
- Toolbar (top)
- List of data sources (left)
- Data source view (center)
- MCPD descriptor list (right)
Toolbar
The toolbar provides access to top-level functions.

| Button | Description |
|---|---|
| Load | Load an existing project file. |
| Save | Save the current project to a file. |
| Settings | Open the Settings dialog. |
| Add file | Add a new data source file to the project. |
| Automap | Automatically map columns of the currently open data sheet to MCPD descriptors. |
| Reset mapping | Remove assigned mapping for the currently open sheet. |
| Push | Open a dialog to send data to Genesys. |
| Add database | Add a new database-backed data source to the project. |
Connecting to a Genesys server
The Settings dialog lets you configure which Genesys server will receive your data.
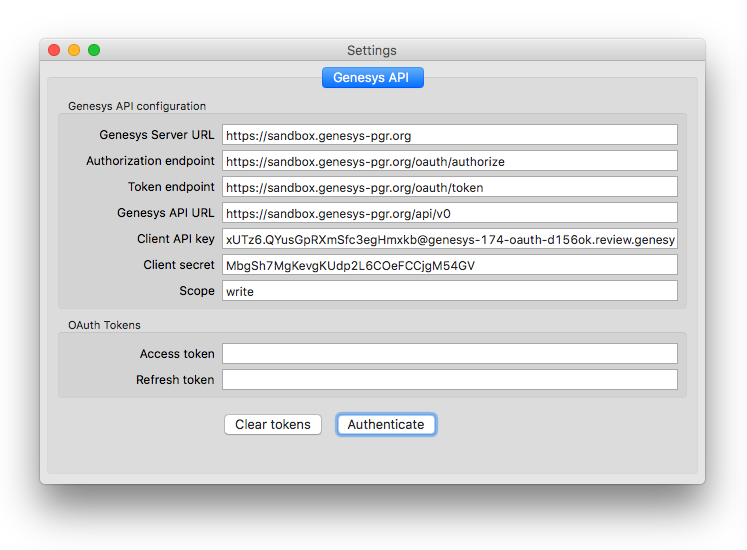
The settings are stored in the project file and will be saved and loaded with the rest of the project configuration.
| Setting | Description |
|---|---|
| Genesys server URL | Base URL of the Genesys server instance. For testing, use https://sandbox.genesys-pgr.org. For production, use https://www.genesys-pgr.org. |
| Client API key and secret | Contact the helpdesk at helpdesk@genesys-pgr.org to obtain valid credentials. Different values are used for sandbox and production environments. |
| Access and refresh tokens | Authentication tokens that identify you to the Genesys server. These are obtained by clicking Authenticate or loaded from the project file. |
| Scope | Must be set to write. |
| Authenticate | Validate the current configuration and authenticate with the server. |
Authenticating with Genesys
A valid user account on Genesys is required. You may use your Google account or create an account manually with a valid email address and password. Make sure you have accounts for both the sandbox environment and the production servers.
After you have obtained a valid client key and secret from helpdesk@genesys-pgr.org and created your Genesys account, click Authenticate. If tokens are missing or have expired, the application will prompt you to authorize access to Genesys on your behalf.
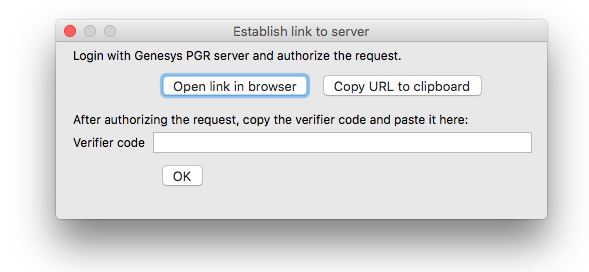
Click Open link in browser to open your default web browser and follow the instructions.
After obtaining the tokens, save the project by clicking Save in the application toolbar. Give the project file a name that tells you which Genesys server (production or sandbox) you have selected.
Data sources
Uploader can load data from Excel XLSX and CSV files and through database SQL queries. Every data source must contain at least the following three columns that uniquely identify an accession:
INSTCODE: FAO WIEWS Institute Code of the holding genebank.ACCENUMB: Full identifier of the accession in the genebank.GENUS: Genus of the accession.
Excel and CSV files
Click Add file in the toolbar and select the source file to add to the project.
Older Excel files with the .xls extension are not supported. Use .xlsx format.
Excel files may contain multiple sheets, which will be listed as individual data source sheets. CSV files contain only one sheet. Double-click a sheet name to open it and load the first 300 rows.
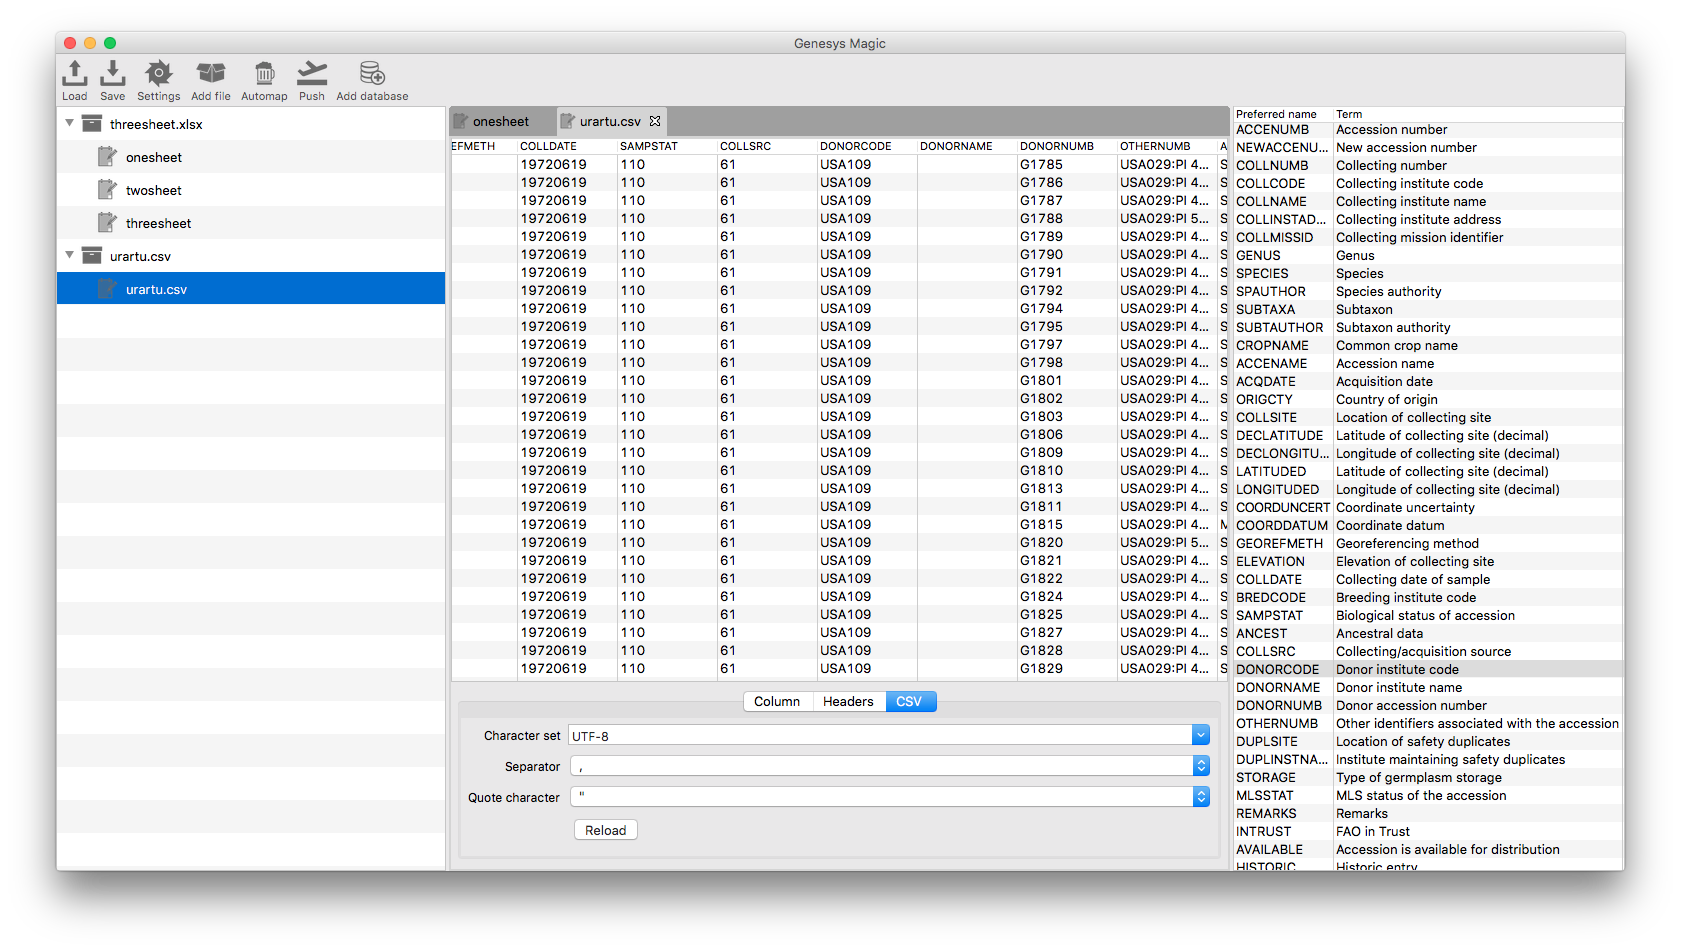
CSV file configuration
CSV files are plain text and do not carry encoding information. When opening a CSV data source, you may need to provide formatting details in the CSV tab of the data sheet.
| Setting | Description |
|---|---|
| Character set | Try windows-1250 for files generated on Windows, or x-MacCentralEurope for Mac OSX. |
| Separator | Pick comma (,) or tab. |
| Quote character | Pick single (') or double quote ("). |
Use Excel XLSX files instead of CSV files when possible. For best results, convert your CSV file to XLSX format.
Header rows
Some data files contain header rows that should be ignored by Uploader.
| Setting | Description |
|---|---|
| Contains headers | Indicate that your file contains a header row. |
| Header row index | Provide the index of the header row, whether it is at the top of a sheet or further down in the file. |
Databases
Uploader can directly query any database system using a valid JDBC driver. Click Add database in the toolbar.
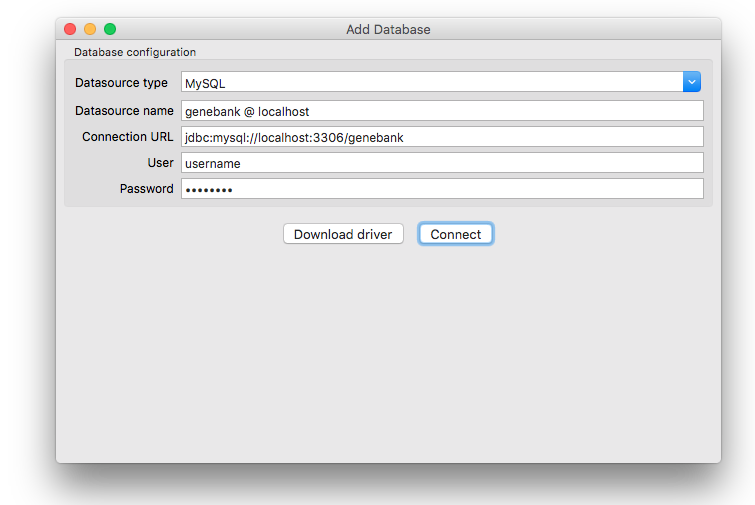
| Setting | Description |
|---|---|
| Datasource type | Select the database type: MySQL, MS SQL Server, PostgreSQL or ODBC. |
| Datasource name | A label for the database connection in the project. |
| Connection URL | The JDBC connection string. You will need to provide the database host name, port and instance name. |
| User and password | Valid credentials to access the database. |
| Download driver | Download the JDBC driver for the selected database type. |
Uploader comes with an embedded MySQL driver; all other drivers need to be downloaded separately.
If your database type is not supported, contact helpdesk@genesys-pgr.org for assistance.
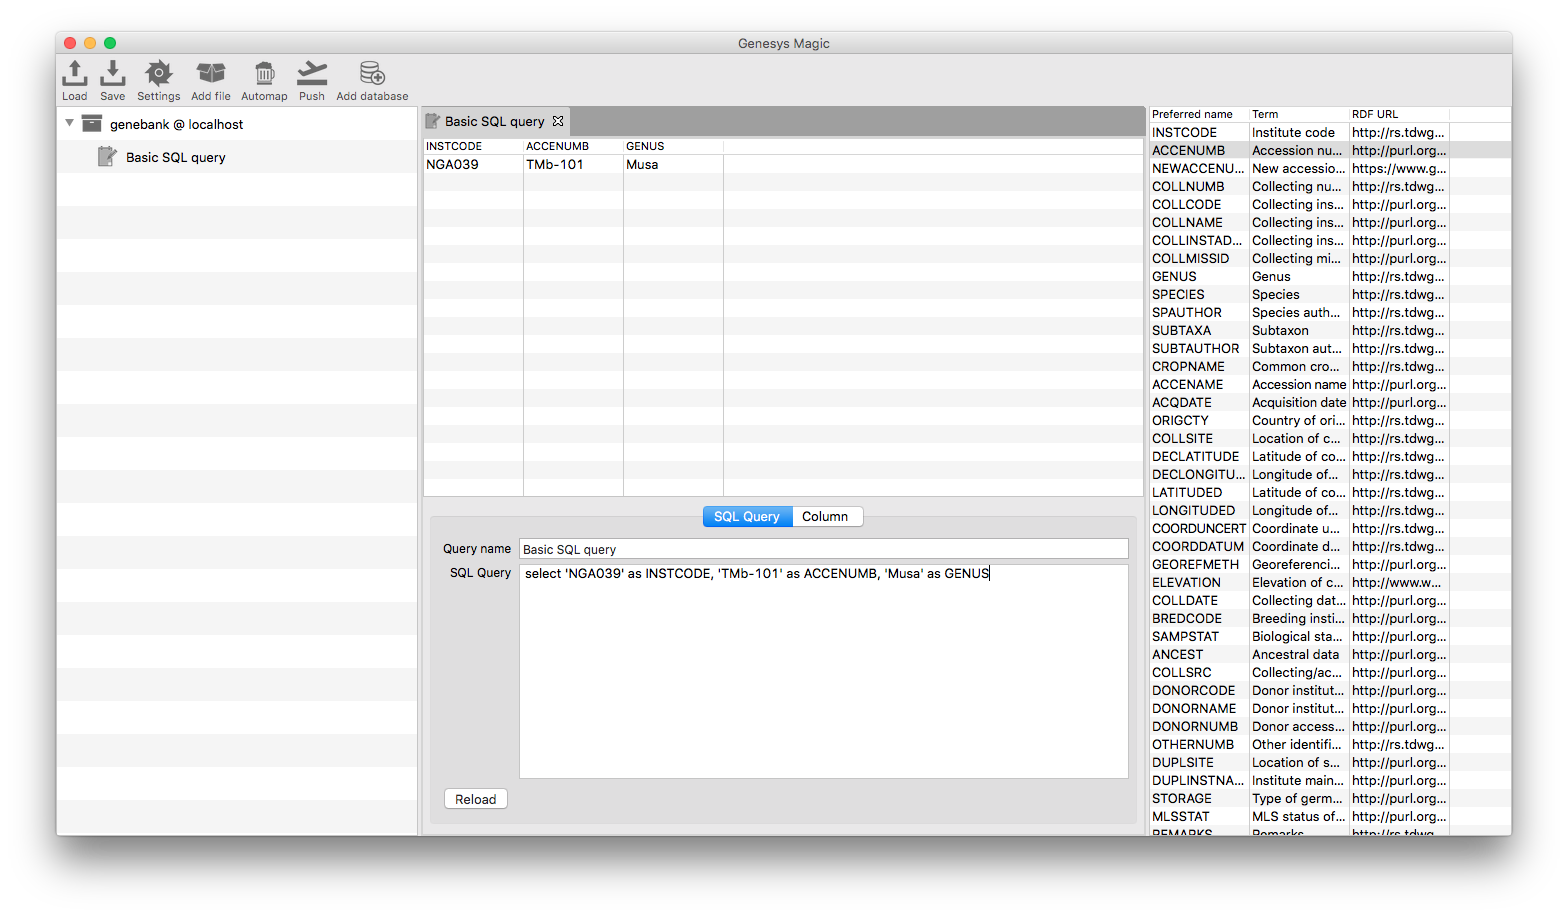
After connecting successfully, the database appears as a top-level data source. Right-click on it and select Add SQL query to create an individual data source.
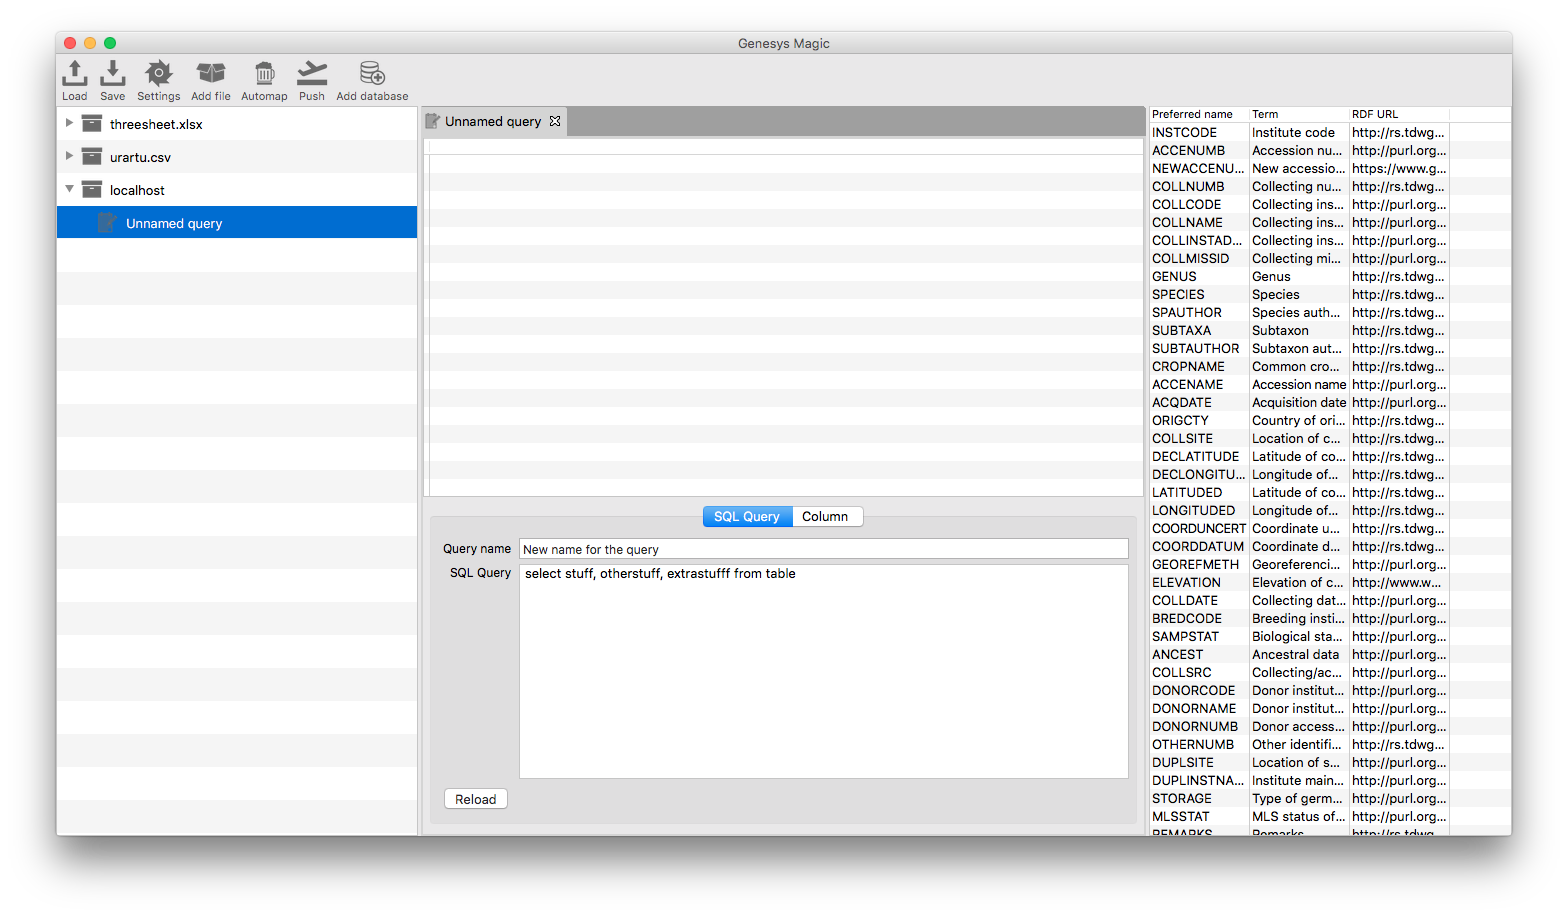
All SQL queries must include INSTCODE, ACCENUMB and GENUS columns.
Mapping to MCPD
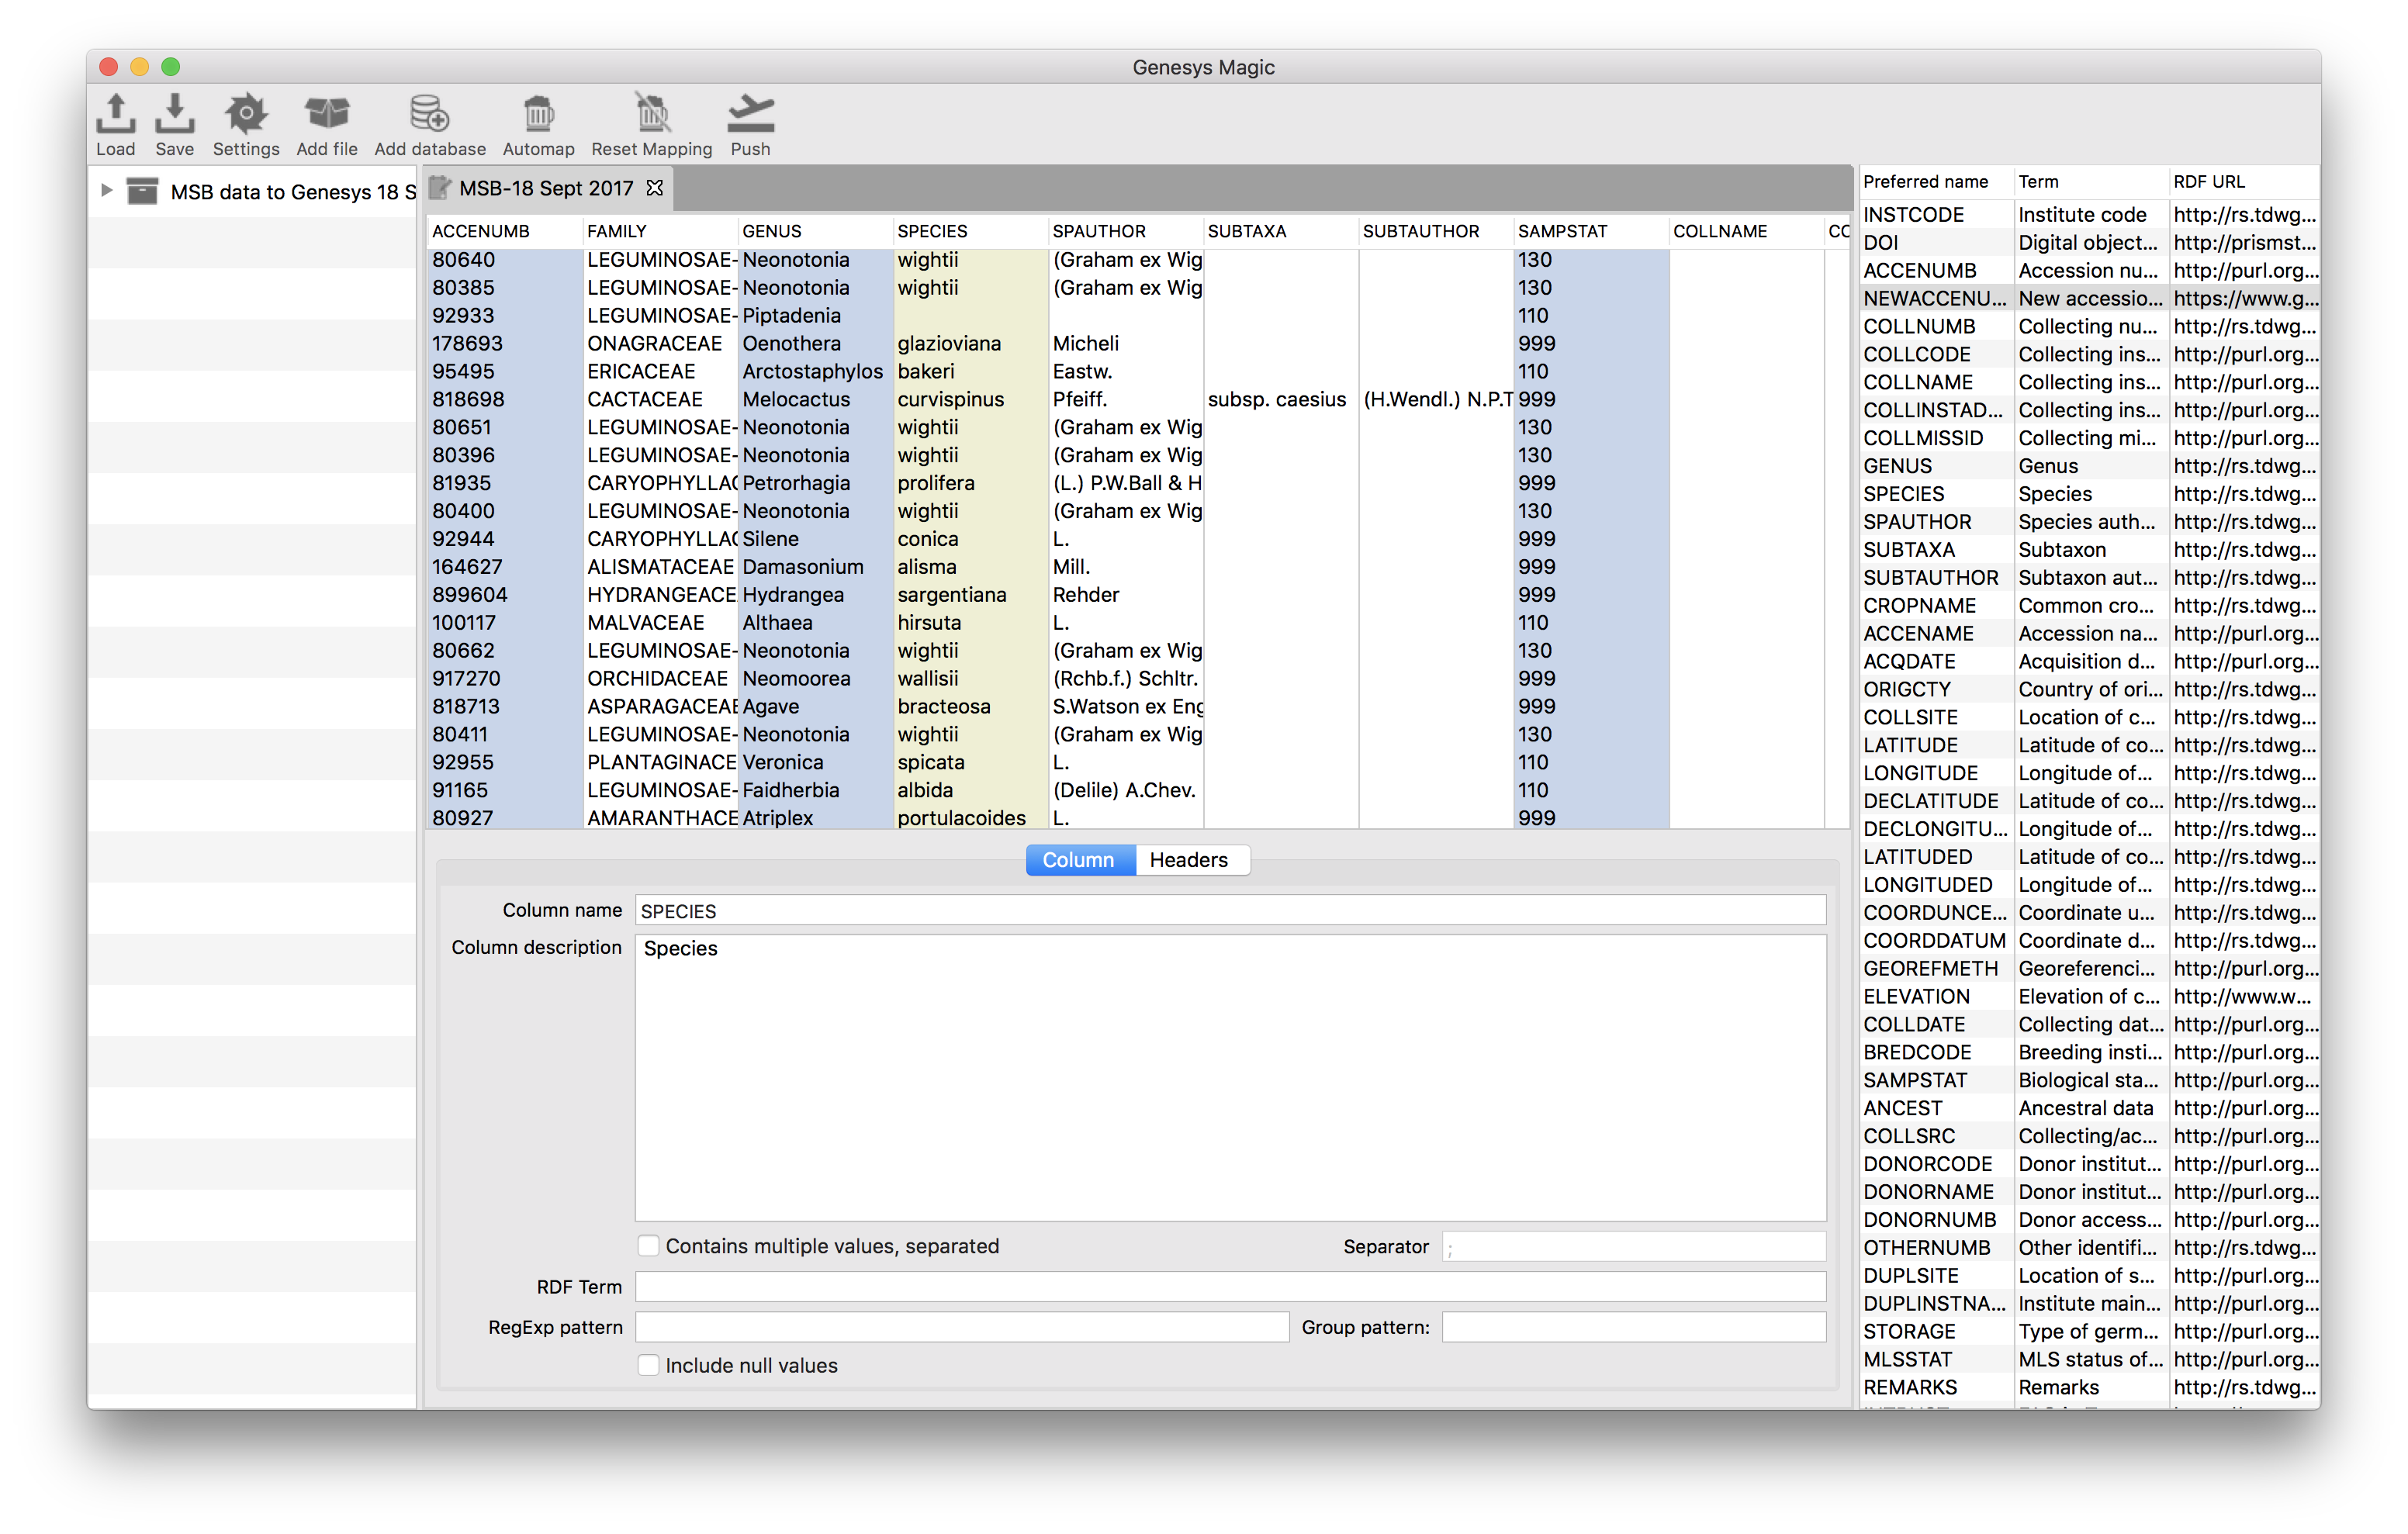
Once you have loaded a data sheet, you need to map its columns to the Multi-Crop Passport Descriptor (MCPD) fields listed on the right side of the application window.
- Open the data sheet.
- Click on the column heading label to load the current column configuration.
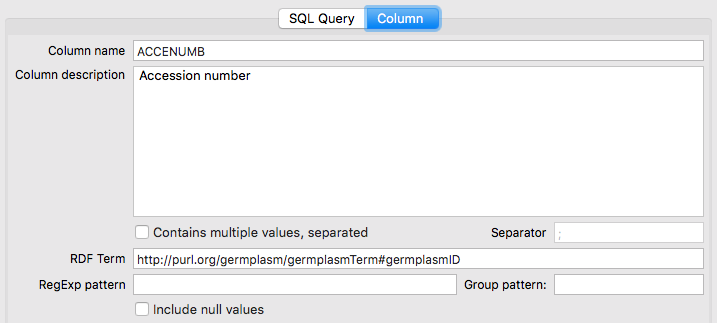
- Drag the descriptor from the MCPD listing to the column configuration pane.
Your existing data must be compliant with MCPD for straightforward mapping with Automap.
Required columns
Genesys requires INSTCODE, ACCENUMB and GENUS for every accession.
- Click on the label of the column containing your FAO WIEWS Institute Code and drag the
INSTCODEdescriptor to the column configuration pane. - Select the column containing your genebank accession numbers and drag the
ACCENUMBdescriptor. - Select the genus column and drag the
GENUSdescriptor.
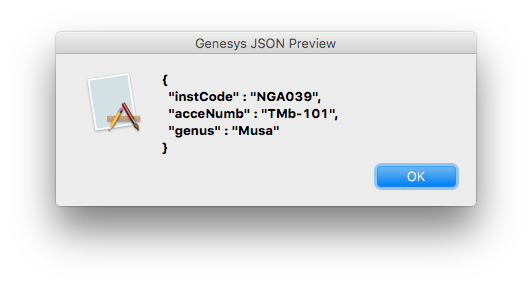
Once these three columns are mapped, double-clicking on a row will display the accession data in mapped Genesys JSON format.
An application error dialog will be displayed when mapping is incomplete.
Handling multiple values
The MCPD standard allows multiple values for certain descriptors, such as the REMARKS field.
Uploader lets you specify whether a single column contains multiple values (and how to split them),
or map multiple columns to the same descriptor. In both cases, the individual pieces will be
converted to an array of values.
Pushing data to the server
After you have mapped your data to MCPD and confirmed that the JSON looks correct, you are ready to push the data to the Genesys server.
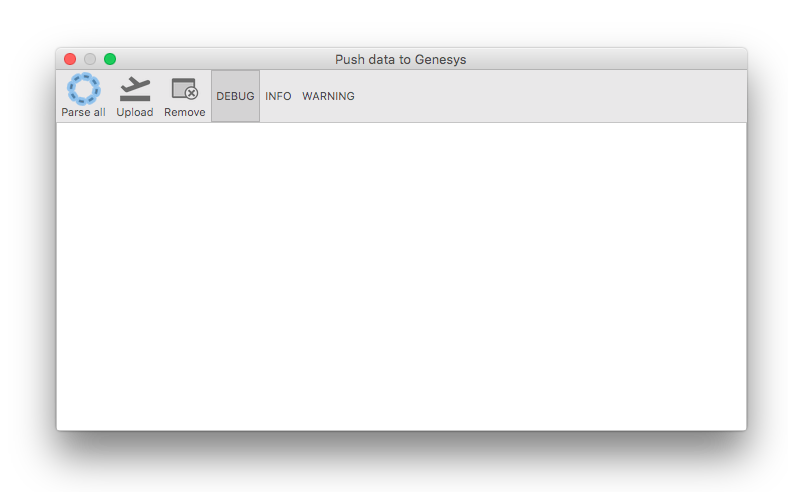
The Push dialog offers four functions:
-
Parse all: Triggers a read-convert-parse operation of all records in the selected data sheet. This checks whether all of your data will correctly load, parse and convert using the current mapping. Keep an eye on the log report and fix any issues before pushing.
-
Upload: Sends the data from the selected data sheet to the configured Genesys server. You will be prompted for the server URL before pushing.
-
Remove: Moves accession records from the active Genesys database to the archive. Only
INSTCODE,ACCENUMBandGENUSmust be mapped to perform this operation.warningIf applicable, use the
HISTORICflag instead of removing records from Genesys.Note that Genesys never actually deletes accession data; it merely moves it to an archive that remains accessible if the record is referenced by its PURL (Permanent URL).
-
Log levels: Toggle the log level between
DEBUG,INFOandWARNto control the level of detail in the log pane. It defaults toINFO.
Troubleshooting
If you run into trouble using this tool, contact helpdesk@genesys-pgr.org for assistance. Based on your feedback, the tool or this section will be updated with resolutions to commonly encountered problems.
Where to go next
- To understand what happens after your data is published, see What happens after uploading.
- For guidance on ongoing data quality, see Maintaining quality.
- For questions or problems, see How to get help.